At a Glance
You sit down to watch a movie, but the dialogue sounds muffled while the explosions shake the floorboards. Tangled wires clutter the room, and the awkward viewing angle strains your neck. Poor sound quality and disorganized cabling ruin the movie-watching experience for everyone in the room.
Hardware mistakes cost real money. A strategic approach prevents expensive missteps and protects your premium equipment from damage. At Desco AV, we simplify the complexity of high-end audio and video integration so you get flawless performance from day one.
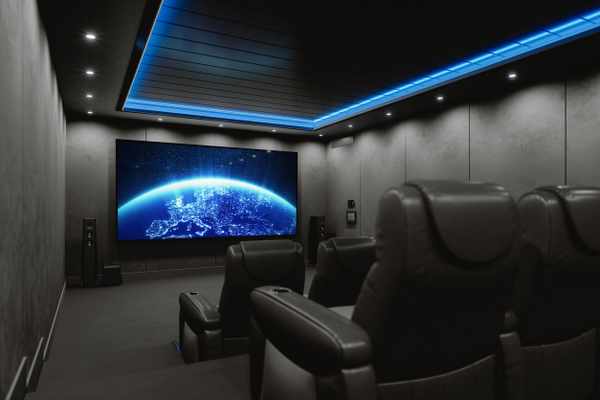
This technical walkthrough transforms a standard media space into a high-performance home theater system. We cover layout design, component selection, wiring standards, and audio calibration.
Designing Your Ideal Home Theater Layout

Space dictates performance. Room dimensions play a massive role in bass distribution and overall sound quality. Square rooms create dead zones where low frequencies cancel each other out, leaving the sound thin and weak. Rectangular rooms distribute bass much better and provide a smoother audio profile from front to back.
The relationship between seating distance and screen size is absolute. Sitting too close to a massive display causes severe eye strain and makes the pixels visible. Sitting too far away ruins the immersion completely. You need to calculate the exact viewing distance to match your specific display size for maximum visual comfort.
Planning before purchasing prevents audio and visual imbalances later. You need to map out sightlines and riser heights for multiple rows of seating so nobody stares at the back of a head. You also need ambient light control to stop washed-out projection screens. Blackout shades and dark paint colors fix light bleed immediately.
Understanding Room Dynamics
Wall materials and room symmetry affect audio reflection long before any equipment arrives. Bare drywall, glass windows, and hardwood floors bounce sound waves violently around the room. Symmetrical spaces allow audio tracks to hit your ears at the exact same time. Planning these home theater acoustics early saves you from constantly adjusting the volume during quiet movie scenes.
Selecting the Right Components for Your Space

Every setup needs a solid foundation to function correctly. The core hierarchy includes your display, an AV receiver, and a dedicated speaker array. TVs work incredibly well in bright rooms with lots of windows. Projectors dominate in dark, dedicated cinema spaces where you want maximum screen size.
The AV receiver acts as the central brain of the operation. It decodes the complex audio formats and routes high-definition video signals straight to your display. You must match the power output wattage of the receiver to your specific speaker requirements. Underpowering speakers causes clipping and destroys tweeters quickly. Leave at least five inches of top clearance above your AV receiver within an enclosed cabinet to prevent thermal shutdown during heavy action scenes.
Room size dictates your speaker choice entirely. Massive floor-standing towers overpower a small room and create muddy, overwhelming bass. Bookshelf or in-wall speakers fit perfectly in tighter spaces while still delivering incredibly clear mid-range frequencies.
The center-channel speaker handles nearly all the spoken dialogue in a movie or television show. Do not skimp on this specific component. Place it directly above or below the screen, pointing straight at your head. If you buy a cheap center channel, you will constantly turn on subtitles to understand what the actors are saying.
The Technical Backbone of Your Setup
Power conditioning protects your heavy investment. Direct wall power fluctuates constantly throughout the day. Power conditioners and surge protectors defend sensitive AV gear from devastating electrical spikes. They also clean up dirty power to remove annoying static hiss from your background audio.
Cabling options depend heavily on your room finish and budget. Flat wire runs cleanly under rugs without causing a tripping hazard. Plastic raceways hide thick cables along baseboards neatly. In-wall cabling offers the absolute cleanest look but takes significantly more effort and planning to execute.
Clean aesthetics and strict safety matter immensely. When running wires inside walls, you must use CL3-rated wiring to meet standard fire safety codes. Standard wire belongs outside the wall.
Best Practices for Wiring

Organization saves time and frustration. Cable labeling prevents massive headaches during future hardware upgrades. Using banana plugs provides secure, interference-free speaker connections. Bare wire oxidizes over time and degrades the audio signal rapidly. Follow these standard wiring practices we recommend on the showroom floor:
- Separate power cables from audio cables to prevent electromagnetic hum.
- Leave two extra feet of slack behind the receiver for easy equipment swapping.
- Use heavy-gauge speaker wire for runs longer than fifty feet to maintain signal strength.
- Bundle loose wires with velcro ties rather than zip ties to prevent cable pinching.
Optimizing Speaker Placement and Surround Sound
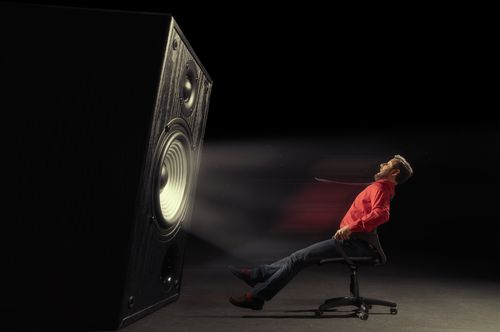
Layouts follow specific industry standards for a reason. A standard 5.1 layout includes the front left, right, center, and two surround channels. A 7.1 channel system adds two rear surrounds for deeper audio movement behind the couch. You must position the front and center channels precisely at ear level for the best clarity.
When handling your surround sound installation, correct speaker angles direct the audio right to the primary listening position. Front left and right speakers need a slight inward angle toward the center seat. Surround speakers perform best positioned just slightly above ear level to create ambient environmental effects like rain or wind.
Subwoofer placement requires patience and physical experimentation. Bass frequencies are omnidirectional, meaning they fill the room heavily. Symmetry matters less for bass than for your main speakers. Placing a subwoofer in a corner amplifies the low-end rumble, but moving it slightly along the front wall often tightens the impact of explosions.
Modern setups lean heavily on Dolby Atmos technology for total immersion. This requires overhead or height-channel integration built into the ceiling. Ceiling-mounted speakers bounce sound downward to create a true multidimensional soundstage. Airplanes and helicopters will sound like they are actually flying right over your couch.
Fine-Tuning Your Audio Experience
Calibration ties the entire room together professionally. You start by running the built-in receiver calibration software. A provided microphone listens to specific test tones and analyzes the unique room acoustics. The software then sets initial speaker distances, delays, and volume levels automatically.
Automated setup rarely gets it perfectly right on the first try. Manual tweaks are often necessary to dial in the final sound. Hard floors and large glass windows confuse automated microphones. You will likely need to adjust crossover frequencies manually to send the right bass tones exclusively to the subwoofer.
This level of media room optimization stops unwanted echoes fast. Blank walls cause sound to bounce endlessly, creating a hollow sound. Placing acoustic panels at first-reflection points absorbs those stray sound waves. Bass traps placed in the room corners absorb heavy, boomy low-end frequencies that muddy the final mix.
Testing proves the real-world results. Guide your testing process using specific movie scenes you know incredibly well. Listen for deep soundstage depth and precise dialogue crispness. A well-tuned setup separates background street noise from front-and-center conversations flawlessly.
System Comparison and Feature Evaluation
| Configure | Ideal Room Size | Installation Complexity | Hardware Investment Level | Immersive Capability | Best Use Case | Technical Requirements |
|---|---|---|---|---|---|---|
| 5.1 Setup | Small to Medium | Low | Moderate | Standard Surround | Living rooms and standard media spaces. | 5-channel AV receiver, 1 subwoofer. |
| 7.1 Setup | Medium to Large | Medium | High | Enhanced Surround | Dedicated home cinemas with rear space. | 7-channel AV receiver, rear wall clearance. |
| 5.1.2 Dolby Atmos | Medium to Large | High | Premium | Multi dimensional 3D Audio | High-end custom theater builds. | Atmos-enabled receiver, ceiling speaker mounts. |
Professional Installation vs. DIY Approaches
Deciding between hiring a professional integrator and handling the installation yourself comes down to time and technical comfort. Both paths offer distinct advantages depending on your budget and experience level.
Pros
Delivers precise acoustic calibration and guaranteed warranty protection.
Provides expert wire management and smooth room integration.
Saves hours of frustrating physical labor.
Matches components perfectly to prevent electrical mismatch.
Cons
Increases the risk of accidental hardware damage when handling heavy displays.
Results in poor acoustic configuration without professional calibration tools.
Wastes valuable time on troubleshooting complex signal chains.
Leads to expensive long-term costs when fixing improper installation methods.
Finalizing Your Custom Home Theater System
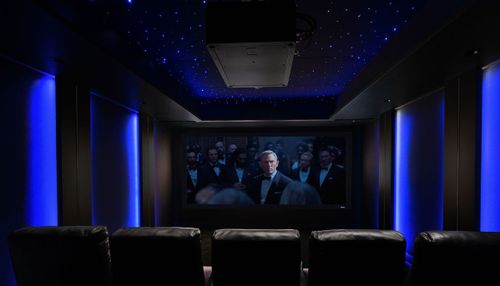
Building the perfect setup requires focused attention to detail. You must prioritize thoughtful room planning, match your components precisely to your available space, and perform exact audio calibration for the best results. Skipping any of these steps results in a mediocre audio and visual experience.
Get the job done right the first time with Desco AV. We offer showroom-based consultations, custom architectural planning, and professional system calibration. You get lifelong customer support and local expertise that massive big-box retailers simply cannot replicate. Shop with us today to transform your living space into the ultimate entertainment destination.
Frequently Asked Questions About Installing a Home Theater System
The ideal viewing distance for a 4K display is roughly one to one-and-a-half times the screen size. Sitting within this specific range maximizes the high-resolution pixel density without causing visual fatigue.
An AV receiver processes uncompressed audio formats and provides dedicated power to multiple individual speakers. This hardware creates true spatial separation that a soundbar simply attempts to fake through digital software.
You can hide speaker wires by routing them through paintable baseboard raceways or tucking flat wire directly under thick area rugs. These surface-level methods keep cables out of sight while completely avoiding permanent structural modifications.
Room shape heavily dictates how bass frequencies distribute and how mid-range audio waves reflect off the side walls. Rectangular spaces predictably bounce sound toward the seating area, whereas square rooms trap heavy bass right in the center.
A dedicated subwoofer handles all extreme low-frequency effects, which frees up your main speakers to focus entirely on clear dialogue and music. This hardware separation prevents audio distortion during bass-heavy action sequences.
You should choose a projector for rooms with complete light control and a large-screen TV for multi-purpose spaces with heavy ambient sunlight. TVs deliver superior daytime brightness, while projectors offer genuine cinematic scale in dark environments.
Why Trust Desco AV?
When you choose Desco AV, you're placing your trust in a family-owned legacy spanning over 50 years, where our mission to deliver exceptional audio-video experiences through innovative design and unwavering personal service guides every project, from custom smart homes to commercial integrations. Rooted in Olympia, WA, we've earned our reputation by evolving with technology while honoring the human connections that started it all: founders Dick Scott and Gene DeRousie built Desco on passion and quality in 1969, Jeffrey Scott expanded it with charismatic expertise and lifelong customer bonds, and now third-generation leader Marie Di Scala upholds that tradition with forward-thinking vision. Our core values, craftsmanship in every installation, reliability you can count on, and genuine relationships that feel like family, ensure we don't just meet expectations; we exceed them, making every space in the South Sound and feel truly exceptional, because your trust is what we've built our home on.